I made a baby blanket for a coworker with all kinds of dishcloth designs I either found or made up myself (I will post about that project later), and one of the squares is a ladybug I found on Designs by Emily:

And a few more ladybug related patterns:
- a kid cardigan with a ladybug (on Ravelry)


- a ladybug hat:

- and another ladybug hat (on Ravelry)


- little crawly bugs (also on Ravelry):

- and more creepy crawlies:


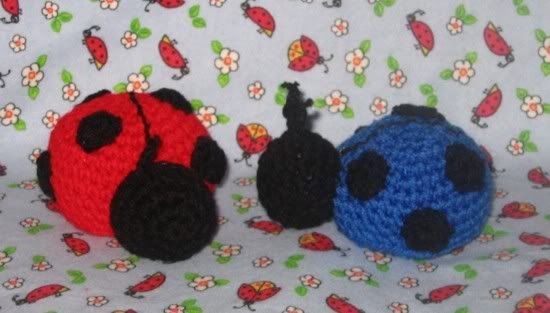
Body
At the end of each round, join with a slip stitch to beginning sc.
With red,
Chain 2, (starting at top of bug body)
1) 5 sc in 2nd chain from hook
2) ch 1, 2 sc in each sc around (10 sc)
3) ch 1, (2 sc in first sc, sc in next sc) repeat around (15 sc)
4) ch 1, (2 sc in first sc, sc in next 2 sc) repeat around (20 sc)
5-7) ch 1, sc in each sc around.. DO NOT FINISH OFF...
Embroider spots now. With black yarn, embroider small X's on bug body.
Resuming with red yarn,.
8) In BLO, ch 1, sc-dec around (10 sc)
STUFF
9) ch 1, sc-dec around (5 sc)
FO leaving long tail. Use tail to sew hole shut on bottom
Weave in ends
Head
With black
Chain 2
1) 5 sc in 2nd chain from hook
2) ch 1, 2 sc in each sc around (10 sc)
3) ch 1, sc in each sc around
FO leaving long tail.
Sew head to body.
Antennas
Cut a 2½ piece of black pipe cleaner. Push through head and bend up.
Trim as desired
Finish
Glue on google eyes.
- I also found this crochet pattern for a ladybug baby rattle (I have not made this yet, but just thought it was way cute!!!) on Crochetville:
Finished size: 2 1/4 inches tall, 4 inches long, and 3 inches wide
Lady bug is worked in one continuous spiral, unless otherwise noted.
Body
With main color, and F hook,
Ch 2
1) 6 sc in 2nd hook from chain
2) 2 sc in each ch around (12 sc)
3) (2 sc in first sc, sc in next sc) repeat around (18 sc)
4) (2 sc in first sc, sc in next 2 sc) repeat around (24 sc)
5) (2 sc in first sc, sc in next 3 sc) repeat around (30 sc)
6) (2 sc in first sc, sc in next 4 sc) repeat around (36 sc)
7-11) sc in each sc around
Slp st to next sc, Ch 1.
12) In BLO (just for this round) (sc-dec, sc in next 4 sc) repeat around (30 sc)
Now, back to working in a continuous spiral,
13) (sc-dec, sc in next 3 sc) repeat around (24 sc)
Now add stuffing and cat ball inside body. Continue stuffing as you go.
14) (sc-dec, sc in next sc) repeat around (16 sc)
15) sc-dec around. (8 sc)
FO leaving longer tail.
Use tail to close hole, weave in end.
Head
With black, and F hook
Ch 2
1) 6 sc in 2nd ch from hook
2) 2 sc in each sc around (12 sc)
3) (2 sc in first sc, sc in next sc) repeat around (18 sc)
4-6) sc in each sc around
7) (sc-dec, sc in next sc) repeat around (12 sc)
Slp st to next sc and FO leaving long tail.
Stuff and sew head to body.
Spots (make 6)
With black and f hook,
Ch 2
1) 7 sc in 2nd ch from hook.
Slp st to first sc, and FO
Sew spots only ladybug.
Antennas
Figure out where you would like the antennas to be.
Cut a piece of yarn about 12 inches long. Fold yarn in half. Using your hook, draw up the middle of the yarn piece, around the stitch where you want one of the antennas. Now, chain an additional 4 chains, using both yarn ends.
You are now going to have a thicker chain for your antenna. Tie a few knots at the top of the antenna. Snip yarn ends close.
Repeat on other side.
I will add patterns to this site as I find them. So please check back...